 Example Round Scores
Team A through Team F do not exist and none of these games were played. The maps and every scoring rule applied below are real: the tables read their point values straight out of the scoring rules, so anything you see here is something that can actually happen to your team.
A round is one week and six games. Six teams play the first five on 6-start maps, then the four highest scorers — and only those four — play game 6, the BONUS game, on a 4-start map. This example follows one group of six through all of it.
Two things make the bonus game different. It pays on a steeper scale, 5 points for the win against 4, and it is the only game where bonuses and penalties exist at all. Games 1 to 5 are placement and nothing else.
Reading the tables: the Placement column is what finishing in that position pays, Bonus is everything earned or lost on top of it, and Total is the two added together. Hover a bonus pill to see the individual bonuses and penalties inside it.
Example Group
| Game # | Map and Game Type | Result | Combat | Points | ||||||
|---|---|---|---|---|---|---|---|---|---|---|
| Place | Team | Dmg Given | Dmg Taken | Kills | Losses | Placement | Bonus | Total | ||
| 1 | 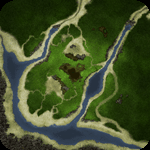 Party in the WabeLast Man on the Hill | 1st | Team A | 358 | 168 | 32 | 15 | +6 | – | 6 |
| 2nd | Team B | 402 | 197 | 36 | 18 | +4 | – | 4 | ||
| 3rd | Team C | 291 | 233 | 26 | 21 | +3 | – | 3 | ||
| 4th | Team E | 244 | 268 | 22 | 24 | +1 | – | 1 | ||
| 5th | Team F | 176 | 315 | 16 | 28 | 0 | – | 0 | ||
| 6th | Team D | 121 | 384 | 11 | 34 | -1 | – | -1 | ||
| 2 |  Red Sand Black BloodTerritories | 1st | Team A | 312 | 152 | 28 | 13 | +6 | – | 6 |
| 2nd | Team E | 287 | 189 | 26 | 17 | +4 | – | 4 | ||
| 3rd | Team B | 264 | 214 | 24 | 19 | +3 | – | 3 | ||
| 4th | Team D | 233 | 246 | 21 | 22 | +1 | – | 1 | ||
| 5th | Team C | 198 | 279 | 18 | 25 | 0 | – | 0 | ||
| 6th | Team F | 142 | 336 | 13 | 30 | -1 | – | -1 | ||
| 3 | 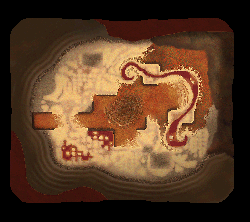 Let Nyx Sort 'Em Out (6 Team)King of the Hill | 1st | Team B | 341 | 174 | 31 | 16 | +6 | – | 6 |
| 2nd | Team D | 296 | 208 | 27 | 19 | +4 | – | 4 | ||
| 3rd | Team C | 268 | 231 | 24 | 21 | +3 | – | 3 | ||
| 4th | Team F | 214 | 262 | 19 | 24 | +1 | – | 1 | ||
| 5th | Team A | 187 | 288 | 17 | 26 | 0 | – | 0 | ||
| 6th | Team E | 133 | 349 | 12 | 32 | -1 | – | -1 | ||
| 4 |  Boil and BubbleKing of the Map | 1st | Team A | 329 | 161 | 30 | 14 | +6 | – | 6 |
| 2nd | Team D | 284 | 202 | 26 | 18 | +4 | – | 4 | ||
| 3rd | Team C | 251 | 238 | 23 | 21 | +3 | – | 3 | ||
| 4th | Team E | 226 | 259 | 20 | 23 | +1 | – | 1 | ||
| 5th | Team B | 193 | 291 | 17 | 26 | 0 | – | 0 | ||
| 6th | Team F | 158 | 347 | 14 | 31 | -1 | – | -1 | ||
| 5 | Gyre in the WabeCaptures | 1st | Team F | 347 | 186 | 31 | 16 | +6 | – | 6 |
| 2nd | Team E | 305 | 205 | 27 | 18 | +4 | – | 4 | ||
| 3rd | Team D | 271 | 232 | 24 | 20 | +3 | – | 3 | ||
| 4th | Team A | 238 | 258 | 21 | 23 | +1 | – | 1 | ||
| 5th | Team C | 214 | 296 | 19 | 26 | 0 | – | 0 | ||
| 6th | Team B | 168 | 352 | 15 | 33 | -1 | – | -1 | ||
| Only Top 4 Scoring Teams Continue | ||||||||||
| 6 | 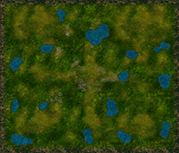 Detachment (Dark)King of the HillBONUS | 1st | Team C | 356 | 214 | 32 | 19 | +5 | 6 | |
| 2nd | Team B | 421 | 236 | 38 | 21 | +3 | 4 | |||
| 3rd | Team A | 298 | 271 | 27 | 24 | +1 | – | 1 | ||
| 4th | Team D | 187 | 402 | 17 | 36 | 0 | -4 | |||
Who Made the Cut
Where the group stood once the 6-start maps were done. The top four go through to the bonus game; the bottom two are finished for the round with whatever they have already banked.
Team C and Team E finish level on points, and only one of them fits. Ties are broken on damage given — total, across the whole round, not in any one game — so Team C goes through on the strength of five games' worth of damage that never earned it a single point directly. This is the one place damage decides something on its own, and it is worth knowing before you decide a lost game is not worth fighting.
After Game 5
| # | Team | Games | Won | Dmg Given | Points |
|---|---|---|---|---|---|
| 1 | Team A | 5 | 3 | 1424 | 19 |
| 2 | Team B | 5 | 1 | 1368 | 12 |
| 3 | Team D | 5 | 0 | 1205 | 11 |
| 4 | Team C | 5 | 0 | 1222 | 9 |
| Bonus Game Cutoff | |||||
| 5 | Team E | 5 | 0 | 1195 | 9 |
| 6 | Team F | 5 | 1 | 1037 | 5 |
Final Standings
| # | Team | Games | Won | Dmg Given | Points |
|---|---|---|---|---|---|
| 1 | Team A | 6 | 3 | 1722 | 20 |
| 2 | Team B | 6 | 1 | 1789 | 16 |
| 3 | Team C | 6 | 1 | 1578 | 15 |
| 4 | Team E | 5 | 0 | 1195 | 9 |
| 5 | Team D | 6 | 0 | 1392 | 7 |
| 6 | Team F | 5 | 1 | 1037 | 5 |
What To Take From It
- Placement is nearly all of your score. A win pays 6 on a 6-start map and the biggest bonus is 1. Bonuses decide close rounds; they do not replace winning.
- Getting into the bonus game is the round's real objective. It is worth up to 6 points and the two teams that miss it score nothing more, whatever they do. The gap between 4th place and 5th in a regular game — one point against none — is often what decides it, and there are five games in which to give one away.
- The bonus game can cost you the round. Its penalties are -2 each and they stack, so a bad one wipes out more than a good regular game earns. A team that limps into it can leave worse off than the teams that never qualified.
- Damage is never worth points directly — but it is the tie-break when totals are level, and in the bonus game it decides both the best-ratios bonus and the least-damage penalty. Playing for the scoreboard and playing for the perm are not always the same thing.
The full rules these tables apply are on the overview page. Official scores for each group will be posted in exactly this format!